Setup HOST Infrastructure
HOST Machine
Nested KVM
เมื่อมีการใช้งาน kvm เราสามารถตั้งค่าเพื่อให้สามารถใช้งาน kvm ซ้อน kvmได้ จะทำให้ instance ที่สร้าง มีประสิทธิภาพการใชงานเร็วกว่าการทำงานบน QEMU emulation โดย Linux kernel จะยังไม่เปิดใช้ความ สามารถนี้โดย default ต้องมีการตั้งค่า:
su -
rmmod kvm-intel
echo 'options kvm-intel nested=y' >> /etc/modprobe.d/dist.conf"
modprobe kvm-intel
ตรวจสอบ kernel parameter:
cat /sys/module/kvm_intel/parameters/nested
Y
Vagrant
การใช้งาน vagrant เพื่อสร้าง development environment

Install vagrant from dnf
sudo dnf install vagrant vagrant-libvirt
repository
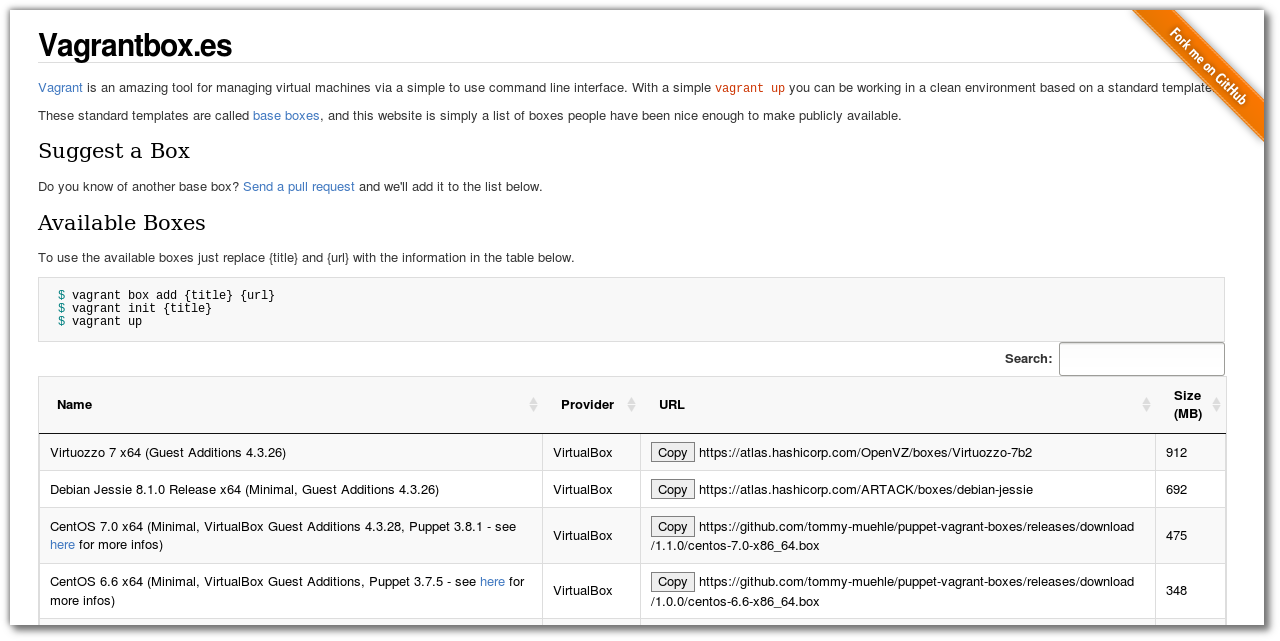
vagrant ได้เตรียม image ไว้มากมายเพื่อให้เราสามารถใช้งาน ได้ โดยสามารถค้นหาและdownload image เพื่อเตรียมทดสอบ https://atlas.hashicorp.com/boxes/search

อีกที่หนึ่ง http://www.vagrantbox.es/
Download box
Note
การสั่งคำสั่ง vagrant cli สามารถใช้งาน ใน user ปรกติไม่จำเป็น root โดย vagrant จะสร้าง directory ให้ที่ $HOME/.vagrant.d/
$ vagrant box add centos/7
==> box: Loading metadata for box 'centos/7'
        box: URL: https://atlas.hashicorp.com/centos/7
This box can work with multiple providers! The providers that it
can work with are listed below. Please review the list and choose
the provider you will be working with.

1) libvirt
2) virtualbox

Enter your choice:
add box อื่น ยกตัวอย่างเช่น:
vagrant box add fedora/24-cloud-base
vagrant box add ubuntu/trusty64
vagrant box add debian/jessie64
สร้าง project directory เพื่อการทดสอบ ชื่อ project01 และ download vagrant box
$ mkdir project01
$ cd project01
$ vagrant init centos/7
$ cat Vagrantfile
(result เมื่อลบ comment ออก)
# -*- mode: ruby -*-
# vi: set ft=ruby :

Vagrant.configure("2") do |config|
  config.vm.box = "centos/7"
end

$ vagrant up --provider libvirt
คำสั่ง vagrant init จะสร้าง Vagrantfile ต้นแบบ เนื้อหาใน file ส่วนมากเป็นตัวอย่าง config การ
ใช้งาน บน virtualbox แต่ในการทดสอบนี้จะทำการสร้าง VM บน KVM hypervisor โดยตรง ที่ผ่านมาจึง
ต้องทำการติดตั้ง plugin ชื่อ vagrant-libvirt
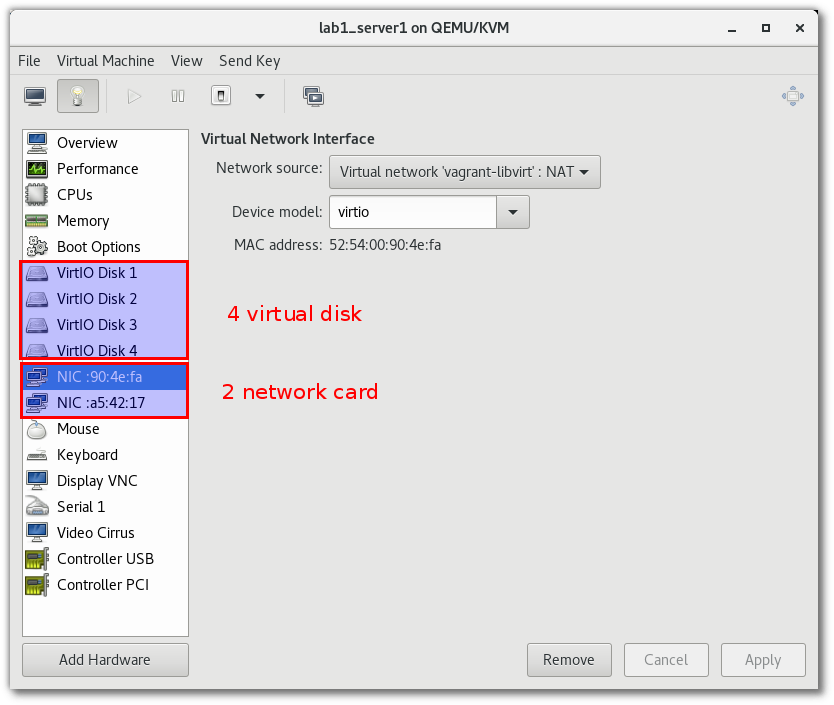
เพิ่มเติม vagrantfile ด้านล่าง
# -*- mode: ruby -*-
# vi: set ft=ruby :

Vagrant.configure("2") do |config|
  config.vm.box = "centos/7"

  config.vm.define :server1 do |node|
  node.vm.hostname = "server1.example.com"
  node.vm.network :private_network, :ip => "20.0.0.10"
  node.vm.provider :libvirt do |domain|
    domain.uri = 'qemu+unix:///system'
    domain.driver = 'kvm'
    domain.memory = 8192
    domain.cpus = 2
    domain.nested = true
    domain.volume_cache = 'none'
    domain.storage :file, :size => '20G'
    domain.storage :file, :size => '20G'
    domain.storage :file, :size => '20G'
  end
  end

  config.vm.define :server2 do |node|
  node.vm.hostname = "server2.example.com"
  node.vm.network :private_network, :ip => "20.0.0.11"
  node.vm.provider :libvirt do |domain|
    domain.uri = 'qemu+unix:///system'
    domain.driver = 'kvm'
    domain.memory = 2048
    domain.cpus = 2
    domain.nested = true
    domain.volume_cache = 'none'
  end
  end

end
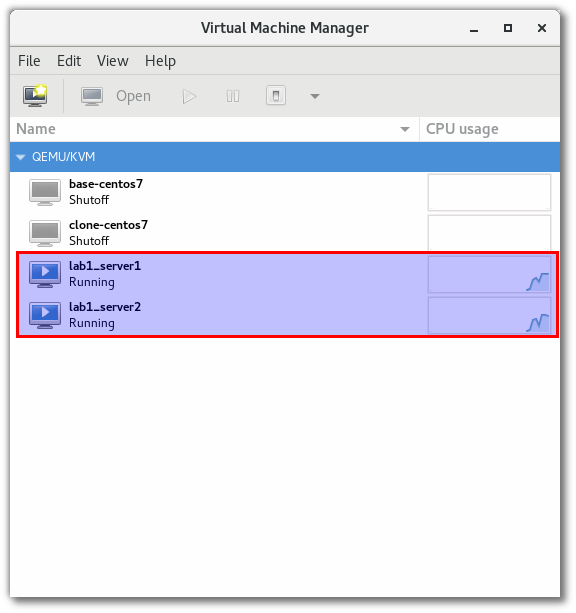
กดเลือก double click lab1_server1 (lab1 ชื่อ project directory และ server1 เป็น ชื่อ VM)
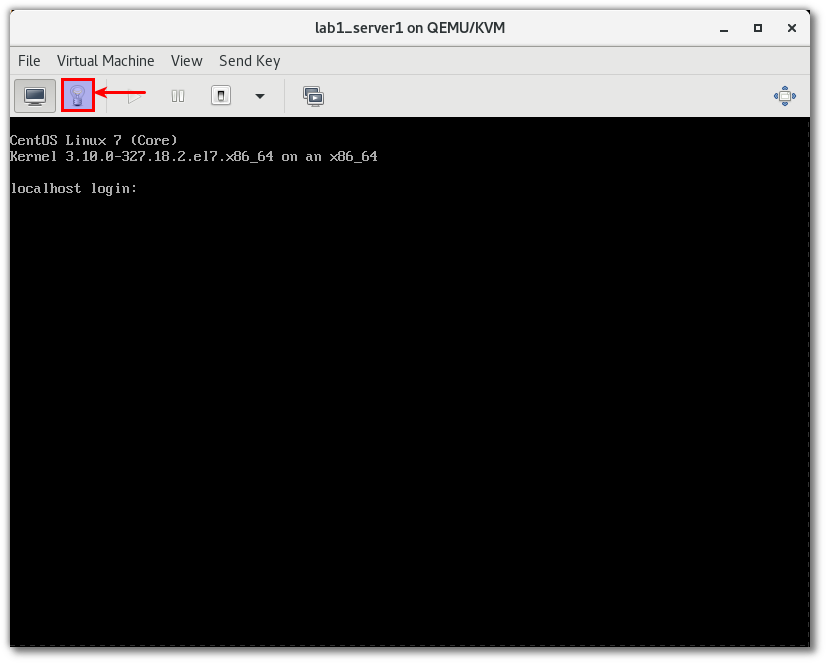
กดเลือก รูปหลอดไฟเพื่อดูรายละเดียด
Connect to VM
สามารถเชื่อมผ่าน vagrant ssh [ชื่อ server] โดยที่ชื่อ ของ Server จะเป็นค่าที่กำหนดแก่ define
vagrant ssh server1
vagrant ssh server2
File System Synce
vagrant ได้ทำการ sync file system ให้ระหว่าง host และ vm ผ่านทาง /home/vagrant/sync
ทำให้ vm สามารถใช้งาน file จากภายนอกได้โดยตรง แต่ถ้าหากมีการเปลี่ยนแปลง file ใน host จะ
ต้องสั่ง vagrant reload ก่อนการใช้งาน vm